

 Flash photography might be intimidating to some but, in my opinion, it could be the one thing you learn that will have the biggest impact on your images.
Photography is all about light. In certain situations, such as landscape or nature photography, you have to learn how to use the available light (i.e. sunrise or golden hour) to best compliment your image. With other situations, such as portrait photography, you have an excellent opportunity to use light that you provide to enhance the image and create the mood you envision.
One of my favorite ways to add light to a photo session is through the use of speedlights or flashes. See the image down below for an example of a speedlight.
I like to use speedlights because they are portable, relatively inexpensive and can produce great results if you know how to use them. Today, I’d like to share with you a few tips on how to get the most out of your speedlights.
Brands
You can buy a flash that’s made by a different company than your camera and as long as you confirm that it’s compatible with your camera brand, it should work just fine. A few things you ought to know however. Name brand flashes (i.e. those made by your camera manufacturer like Canon or Nikon) will typically “play well” with the camera and include more features. Some of these features might include automatic flash metering (the camera will determine how much light is needed in a scene and adjust the flash accordingly) and high speed sync.
Typically name brand flashes cost more. In comparison, an off brand can perform nearly as good as a name brand, but cost significantly less. Let’s take a look at a couple examples below.
My Canon 580EXII speedlight flash has a guide number (power rating) of 580, a zoom range of 24mm – 105mm and costs $680.
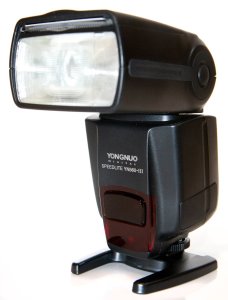
The $70 YN560 III Speedlight
My Yongnuo YN560 III speedlight flash has a guide number of 560, a zoom range of 24mm – 105mm and costs $70. Yes, $70. You could buy almost 10 Yongnuos for the price of one Canon flash.
The Canon has more features. On the Yongnuo you’ll need to press a button (gasp!) to manually increase or decrease the flash output power to suit your scene. I own 5 Yongnuos and use them more often than my Canon flash.
Here’s a link to the Yongnuo flashes I use. This is an affiliate link. If you use it, at no additional cost to you, a small portion of your purchase price will go to support my efforts here at Pocket Lenses and I thank you! Yongnuo YN 560 III
Controlling The Light
By adjusting the 1) power output of your flash (how brightly it pops), 2) shutter speed or 3) aperture, you can control the exposure (brightness) of the background, the foreground / subject or both. Check out the video for an example of this. Here’s a quick summary.
By setting your camera on “M” for manual, you can control the ISO, aperture and shutter speed to get the “right” exposure for a scene. In my video example I set the ISO at 200 and leave it there to eliminate one variable and focus on the others.
By changing the flash output, you can control the brightness of the foreground or subject. Changing your flash output will NOT have an effect on the background (unless your background is very close to your subject).
By changing the shutter speed, you can adjust the exposure of the background without affecting the foreground subject. It’s a weird thing to see (check out the video), but you can make the background darker or lighter and yet the subject stays the same exposure. The reason for this is that the flash happens SO fast that it pops and is done before the shutter closes (unless you go faster than 1/200th of a second, but we’ll discuss that at another time). What this means is that no matter if your shutter is at 1/25 or 1/200 the sensor will still experience the full pop of light from your flash. No more, no less. BUT, the background has more OR less chance to deliver the “natural”, ambient light to the sensor and this DOES make a difference.
By changing the aperture you let in more or less light. This affects the entire scene background and foreground. What this means is you can adjust your aperture, then adjust your flash power accordingly to get the right balance.
If you’re confused, check out the video. The examples I use there should help clear things up.
Oh, and if you think you might purchase ANYTHING from Amazon, please use this link: AMAZON. It’s an affiliate link and ANYTHING you buy, at no additional cost to you, will send a small portion of your purchase price to help support my efforts here at Pocket Lenses.
Here’s the video …
Learn about the iPhone Camera
Very well done! Clear and consice.
Thanks Bill! Flash photography is not all that hard if you know these simple concepts.
Thanks for the recommendation on the Yongnuo speedlight. The video really made it all come together for me. Well done!
Glad that was helpful Phil!